
Using an online tutorial, we applied lighting to a robot in Maya.
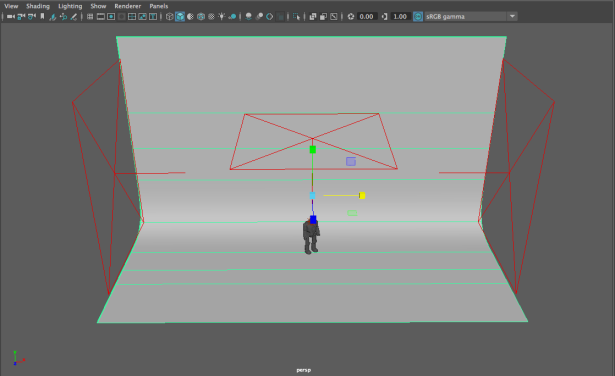
First, I downloaded and opened the Arnold file. Then, I created 3 area lights – one either side of the robot and one above.

I then went into each of the lights and selected the attribute editor. In this panel, I set the exposure of all of the lights to 8, and enabled colour temperature for the left and right lights. Then, I changed the temperature value of the left light to 4000 to achieve a warmer hue.
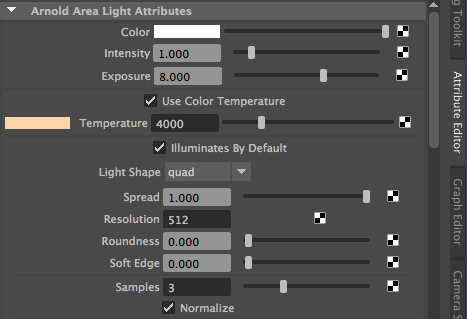


To reduce the noise of the area lights by changing the samples from 1 to 3 in the attribute editor. Above is an example of the change from the website.
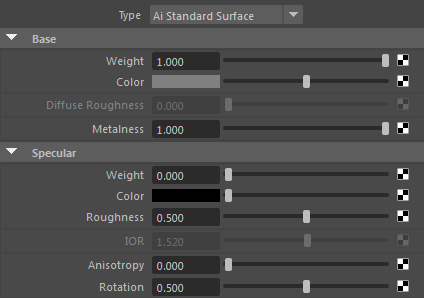
After this, I applied a Standard Surface shader to the whole robot. You can do this by going to Windows > Rendering Editors > Hypershade or by selecting the shape, holding down RMB and selecting Assign New Material. After assigning the standard surface, I changed the properties of the material to make it look like metal.
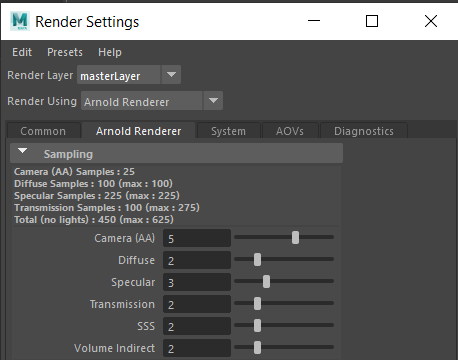
When rendering an image of Arnold, I went into the Arnold Renderer settings and changed the values as featured above.
Here is what the rendered image looks like:

This photorealistic lighting accentuates the shiny properties of the material and creates natural soft shadows as opposed to Maya’s default lighting which would likely create hard shadows, making the overall image appear less realistic. Maya lighting will create perfectly sharp edges whilst photorealistic lighting will emphasize a clean beveled effect on the object edge.
